
How to Change a Car Tyre
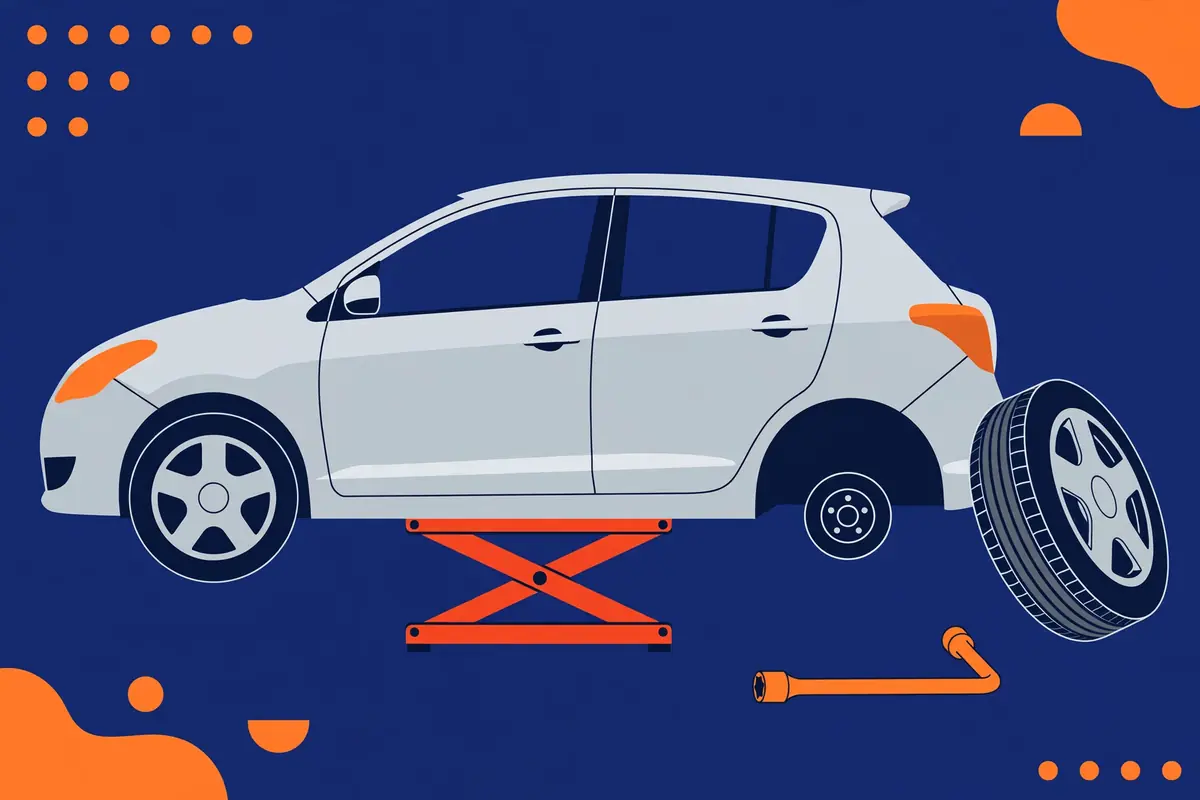
A flat tyre has a habit of arriving at the worst possible moment: on a dark road, in the rain, or when you are already late. Knowing how to change a car tyre turns that stressful moment into a job you can finish in about half an hour, with nothing more than the tools already in your boot. This guide walks you through every step, from getting safe to torquing the wheel nuts correctly, so you can get moving again with confidence.
⚡ Quick Answer: How to Change a Car Tyre
To change a car tyre, park on flat, firm ground, switch on your hazard lights and apply the handbrake. Loosen the wheel nuts a quarter-turn while the wheel is still on the ground, then jack the car up at the correct jacking point until the flat tyre clears the road. Remove the nuts and the wheel, fit the spare, and hand-tighten the nuts in a star pattern. Lower the car, tighten the nuts to the torque figure in your owner’s manual, and re-check the torque after 50 to 100 kilometres. If you are on a motorway hard shoulder, on a slope, or in any way unsure, call roadside assistance instead.
Tools You Need to Change a Car Tyre
Most cars carry the essentials already. Before you ever need them, check that everything is actually in the boot and in working order. A missing locking wheel nut key discovered at the roadside is a problem you do not want.
- Spare wheel: a full-size spare, a space-saver, or a tyre repair kit, depending on your car. Check its pressure at least twice a year, because an unused spare slowly loses air.
- Jack: usually the scissor jack supplied with the car, designed for your exact model.
- Wheel brace (lug wrench): make sure it fits your wheel nuts. If your car has locking wheel nuts, you also need the matching key.
- Torque wrench: strongly recommended, because it tightens the nuts to the exact figure your manufacturer specifies.
- Wheel chocks: a brick or a purpose-made chock stops the car rolling while it is raised.
- Gloves, a torch and a high-visibility vest: changing a wheel is dirty work, and you want to be seen by other drivers.
- Warning triangle: the UK Highway Code recommends placing one at least 45 metres behind your car on a road.
- Tyre pressure gauge: to confirm the spare is at the right pressure before you drive on it.
If your car has no spare and only a sealant kit, read the instructions now, not when you are stranded. Sealant kits only fix small tread punctures and are no use for sidewall damage or a blowout.
Safety First: Before You Touch a Tool
Changing a tyre is straightforward, but the environment around you is the real risk. The AA advises drivers not to attempt a wheel change on a motorway hard shoulder, and the Highway Code says you should only change a tyre if you can do so without putting yourself or others at risk. If your flat happens on a busy motorway, a blind bend or a steep slope, the right move is to call for help and wait somewhere safe.
On a quieter road, choose level, firm ground, well away from moving traffic. Soft grass, gravel or a slope can let a jack slip or sink. Switch on your hazard lights, apply the handbrake, and put the car in gear (or Park for an automatic). Chock the wheel diagonally opposite the flat one. Take all passengers out of the car and move them to a safe place away from the road, behind a barrier if there is one.
Never, under any circumstances, put any part of your body underneath a car that is supported only by a jack. A jack is a lifting device, not a support. If you need to work underneath the car, that is a job for a garage with proper axle stands.
How to Change a Car Tyre Step by Step
Step 1: Loosen the wheel nuts
With the car still firmly on the ground, remove the hubcap if there is one, then use the wheel brace to loosen each nut by about a quarter to half a turn, turning anticlockwise. Do not remove them yet. Loosening them now matters, because once the wheel is in the air it will spin freely and the car could shift. Push down on the brace rather than pulling up, and use your hands, not your feet. If a nut will not budge, a short length of pipe over the brace handle gives extra leverage, but never stamp on it.
Step 2: Position the jack
Your owner’s manual shows the correct jacking points, usually a reinforced section of the sill near each wheel. Placing the jack anywhere else can damage the bodywork or, worse, let the car slip. Set the jack on flat, solid ground and make sure it is square under the jacking point before you start lifting.
Step 3: Raise the car
Wind or pump the jack slowly until the flat tyre is just clear of the ground, about 2 to 3 centimetres is enough, or around 10 centimetres if you need room to manoeuvre the spare on. There is no need to lift the car any higher than necessary. Double-check that the jack is still sitting straight and stable before you go any further.
Step 4: Remove the flat wheel
Unscrew the wheel nuts completely and put them somewhere safe, a pocket or the hubcap, where they cannot roll away. Grip the tyre at the sides and pull it straight towards you. Wheels can be heavy and awkward, so keep your back straight and lift with your legs.
Step 5: Fit the spare wheel
Line up the holes in the spare wheel with the studs or bolt holes on the hub and push it on firmly. Then thread each nut on by hand, turning clockwise, until it is finger-tight. Tighten them in a star pattern, one nut, then the one diagonally opposite, so the wheel seats evenly on the hub. This is the correct pattern whether you have four, five or six nuts.
Step 6: Lower the car and torque the nuts
Lower the jack until the spare tyre is resting on the ground and carrying some of the car’s weight, then tighten the nuts again in the same star pattern with the wheel brace. Lower the car fully, remove the jack, and finish with a torque wrench set to the figure in your owner’s manual. That figure is commonly in the range of 90 to 140 Nm for many passenger cars, but your manual is the only authoritative number. Over-tightening can stretch or damage the studs, while under-tightening can let the wheel work loose. If you do not own a torque wrench, get the nuts checked at a garage as soon as possible.
Step 7: Check, stow and drive off
Check the spare tyre’s pressure with your gauge and inflate it if needed. Stow the flat wheel, jack and tools securely so nothing rattles around in the boot. Take a short, slow drive and listen for anything unusual. If you fitted a space-saver spare, respect its limits, which are typically a maximum of 80 km/h (50 mph) and a limited distance, often around 50 miles, and head straight for a tyre fitter.
Understanding Spare Tyre Types
Not every spare is the same, and knowing which one you carry changes how you drive afterwards. A full-size spare is a normal wheel and tyre, identical to the ones on the car, and you can drive on it normally until you arrange a repair. A space-saver, sometimes called a donut, is a smaller, lighter temporary wheel designed only to get you to a garage. It limits your speed and distance, and it changes the car’s handling, so drive gently and avoid motorways where possible.
Some cars have no spare at all. Instead they carry a tyre repair kit with sealant and a small compressor, or run-flat tyres that can be driven for a limited distance after a puncture. Run-flat tyres are typically limited to around 50 miles at no more than 50 mph, and like a space-saver they are a get-you-home solution, not a permanent fix. A spare tyre is only useful if it is inflated and undamaged, so make checking it part of your regular routine. Tyre sizes are printed on the sidewall in a format such as 205/55 R16, and your spare must match the size and load rating your car requires. You can read more about punctures and their causes on Wikipedia’s page on flat tyres.
After You Change the Tyre
The job is not quite finished when the car is back on the ground. Re-check the wheel nut torque after 50 to 100 kilometres of driving, because nuts can settle slightly as the wheel beds in. Get the punctured tyre repaired or replaced promptly: a space-saver is a temporary measure, and even a full-size spare leaves you with no backup if you get a second puncture. Ask the tyre fitter to check the wheel for hidden damage too, since a pothole or kerb strike hard enough to burst a tyre can also bend a rim.
When you get home, put everything back where it belongs and check the jack and brace are still in good condition. If you used a sealant kit, replace the sealant bottle, as most are single-use. It is also worth practising the whole process once in your driveway on a dry day. The first time you change a wheel should not be in the dark, in the rain, on a roadside verge.
Common Mistakes to Avoid
The most common error is skipping the safety steps: changing a wheel on a slope, on soft ground, or on a busy road without hazard lights or a warning triangle. The second is jacking the car at the wrong point, which can damage the sill or let the car slip off the jack. Third, many drivers tighten the nuts in a circle rather than a star pattern, which can leave the wheel sitting unevenly on the hub. Fourth, over-tightening with a long bar or by standing on the brace can stretch the studs and make the nuts almost impossible to remove next time. Finally, forgetting to re-check the torque after driving is a mistake that costs nothing to avoid and can matter a great deal. If you want a refresher on the tools involved, Wikipedia explains how a torque wrench works.
For more motoring know-how, browse our Automotive guides, and if a flat tyre has disrupted a journey, our Travel section has plenty of advice for getting back on the road.
Frequently Asked Questions
How long does it take to change a car tyre?
For someone who has done it before, around 20 to 30 minutes. Your first time will take longer, which is another reason to practise in your driveway before you need to do it for real.
Can I drive on a flat tyre to reach a garage?
No. Driving on a flat tyre, even a short distance, can destroy the tyre and damage the wheel rim, and it puts you and other road users at risk. Stop as soon as it is safe to do so and change the wheel or call for help.
How tight should wheel nuts be?
To the torque figure in your owner’s manual, commonly 90 to 140 Nm for passenger cars. Use a torque wrench, tighten in a star pattern, and re-check after 50 to 100 kilometres.
How fast can I drive on a space-saver spare tyre?
Most space-saver spares are limited to 80 km/h (50 mph) and a distance of around 50 miles. Check the markings on your spare and your owner’s manual, and drive gently until you reach a tyre fitter.
What should I do if I cannot loosen a wheel nut?
Try a longer bar for leverage, and make sure you are turning anticlockwise. If it still will not move, or you suspect the nut is damaged, stop and call roadside assistance rather than risking injury or rounding the nut.